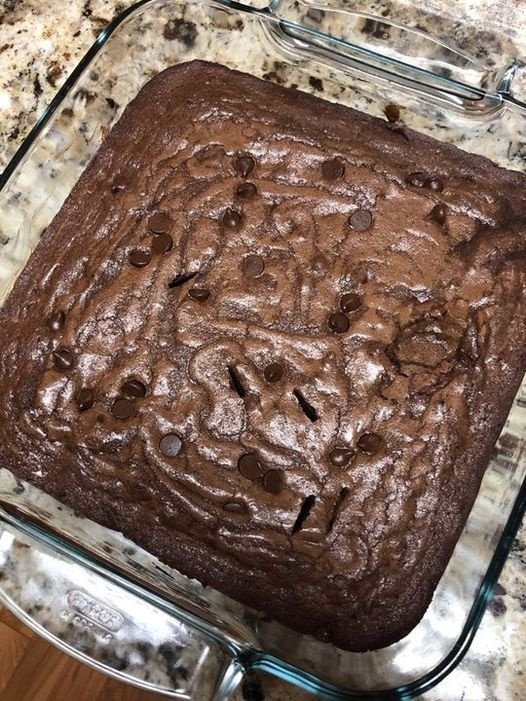
This is a fantastic, classic recipe for deeply fudgy and rich brownies. The use of melted butter and cocoa powder (the “one-bowl” method) is a surefire way to achieve a dense, moist texture.
Here is a complete, formatted recipe with instructions and tips to ensure your brownies are perfect.
Table of Contents
ToggleOne-Bowl Fudgy Cocoa Brownies
These brownies are intensely chocolatey, incredibly fudgy, and have that beautiful, shiny, crackly crust on top. Using cocoa powder makes them quick and easy to mix up in just one bowl.
Prep time: 15 minutes
Bake time: 30-40 minutes
Cooling time: 1-2 hours
Yields: 16-20 brownies
Ingredients
-
1 cup (2 sticks / 226g) unsalted butter, melted and slightly cooled
-
1 ½ cups (300g) granulated white sugar
-
½ cup (100g) dark brown sugar, packed
-
4 large eggs, at room temperature
-
1 tablespoon pure vanilla extract
-
1 cup (120g) all-purpose flour
-
1 cup (80g) Dutch-processed or unsweetened cocoa powder, sifted if lumpy
-
1 teaspoon kosher salt
-
1 ¼ cups (210g) semi-sweet or dark chocolate chips, divided
Instructions
-
Preheat and Prepare: Preheat your oven to 350°F (175°C). Line an 8×8-inch or 9×9-inch metal baking pan with parchment paper, leaving an overhang on two opposite sides for easy removal. Grease the parchment lightly.
-
Combine Wet Ingredients: In a large bowl, whisk together the melted (and cooled) butter, granulated sugar, and brown sugar until well combined. It’s okay if it looks a little gritty.
-
Add Eggs and Vanilla: Add the eggs one at a time, whisking vigorously after each addition until the mixture is thick, smooth, and slightly paler in color. This step is key for that shiny crust! Whisk in the vanilla extract.
-
Add Dry Ingredients: Switch to a spatula or wooden spoon. Gently fold in the flour, cocoa powder, and salt until just combined. Be careful not to overmix. The batter will be thick.
-
Add Chocolate Chips: Fold in 1 cup of the chocolate chips, reserving the remaining ¼ cup for the top.
-
Bake: Spread the thick batter evenly into the prepared pan. It may require some patience to spread it smoothly. Sprinkle the remaining ¼ cup of chocolate chips over the top.
-
For an 8×8-inch pan: Bake for 35-40 minutes.
-
For a 9×9-inch pan: Bake for 30-35 minutes.
The brownies are done when the top is shiny and set, and a toothpick inserted into the center comes out with a few moist crumbs attached (not wet batter). Do not overbake!
-
-
Cool Completely: This is the hardest but most important step. Allow the brownies to cool completely in the pan set on a wire rack. This will take at least 1-2 hours. For the cleanest, fudgiest slices, chill the cooled brownies in the refrigerator for an additional hour before cutting.
-
Slice and Serve: Use the parchment paper overhang to lift the entire brownie slab out of the pan. Place it on a cutting board and slice into squares with a sharp knife.
🌟 Pro-Tips for the Perfect Brownie:
-
Don’t Overmix: Once you add the flour and cocoa, mix only until the last streaks of dry ingredients disappear. Overmixing develops gluten, leading to cakey, tough brownies.
-
The Secret to a Shiny Crust: Whisking the eggs and sugar very well is the secret. This dissolves the sugar and incorporates air, which creates a delicate, shiny meringue-like layer on top as it bakes.
-
Dutch-Processed vs. Natural Cocoa: Dutch-processed cocoa is less acidic and provides a deeper, richer chocolate flavor. Natural cocoa will also work but has a sharper, more acidic taste. This recipe works well with either.
-
Testing for Doneness: The toothpick test is your best friend. You want a few sticky crumbs, not a clean toothpick. A clean pick means they are overbaked and will be dry.
-
Chilling is Key for Clean Cuts: For those picture-perfect, sharp edges, chilling the brownies is non-negotiable. It firms up the butter and makes slicing much easier.
Enjoy your incredibly easy and decadent homemade brownies! They are sure to become a go-to recipe.
