 Skip to content
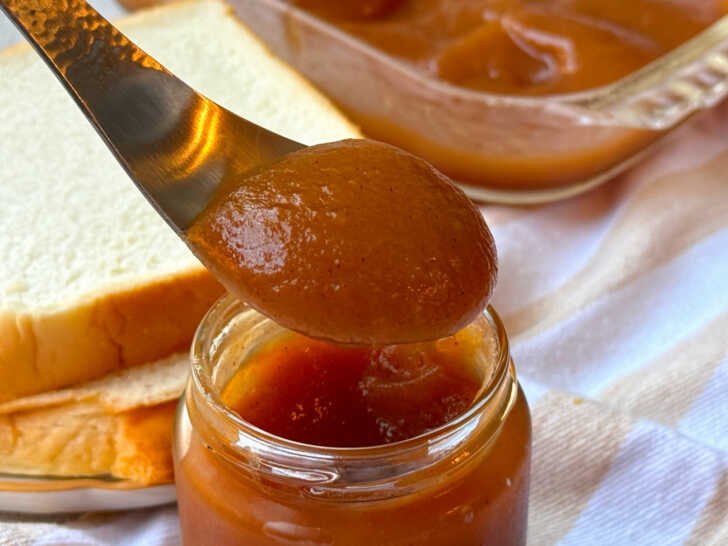
Stovetop apple butter is a wonderful way to make this rich, spiced spread without needing a slow cooker. It fills your home with an incredible autumnal aroma and yields a deeply flavorful, velvety-smooth result.
Here is a detailed, easy-to-follow recipe.
Stovetop Apple Butter
This method is faster than the slow cooker version but requires a bit more attention. The result is a deeply caramelized, intensely apple-flavored butter.
INGREDIENTS:
-
3-4 lbs mixed apples (about 10-12 medium apples) – See note below
-
½ cup apple cider (or water)
-
½ cup brown sugar, packed (or more to taste)
-
¼ cup granulated sugar (or more to taste)
-
1 tbsp ground cinnamon
-
½ tsp ground ginger
-
¼ tsp ground cloves
-
¼ tsp ground allspice
-
¼ tsp salt
-
1 tbsp vanilla extract (add at the end)
-
1 tbsp lemon juice (add at the end)
BEST APPLES TO USE:
Use a mix of sweet and tart varieties for the best flavor.
-
Sweet: Fuji, Gala, Honeycrisp
-
Tart: Granny Smith, Braeburn, McIntosh
A combination like Granny Smith and Fuji is perfect.
INSTRUCTIONS:
1. Prep the Apples:
-
Wash the apples. There’s no need to peel them—the peels will add great flavor and pectin, and they’ll be strained out later.
-
Core the apples and chop them roughly into 1-inch chunks. The size doesn’t have to be perfect as they will cook down.
2. Cook the Apples:
-
Place the chopped apples and apple cider (or water) in a large, heavy-bottomed pot or Dutch oven. The heavy pot prevents scorching.
-
Bring to a boil over medium-high heat, then reduce the heat to low, cover, and simmer for about 20-30 minutes, stirring occasionally, until the apples are completely soft and mushy.
3. Purée the Mixture:
-
Remove the pot from the heat. You have two options:
-
Food Mill: This is the best tool as it easily removes the peels and seeds while creating a smooth purée.
-
Immersion Blender: Carefully blend the mixture right in the pot until smooth. You must then press this purée through a fine-mesh sieve to remove the bits of peel for a perfectly smooth texture.
-
-
Return the smooth apple purée to the pot.
4. Reduce and Cook Down:
-
Stir in the brown sugar, granulated sugar, cinnamon, ginger, cloves, allspice, and salt.
-
Cook over the lowest possible heat, uncovered. You want a very gentle simmer with occasional bubbles.
-
Cook for 1 to 1.5 hours, stirring every 10-15 minutes to prevent sticking and scorching on the bottom. The apple butter will slowly darken in color and thicken significantly.
5. Test for Doneness:
-
The apple butter is ready when it is thick, deep brown, and holds its shape on a spoon. To test: place a small spoonful on a chilled plate. If no liquid seeps out around it after a minute, it’s done.
-
Once finished, remove from heat and stir in the vanilla extract and lemon juice. Taste and adjust spices or sweetness if needed.
6. Can or Store:
-
For Immediate Use: Let cool and store in airtight containers in the refrigerator for up to 3 weeks.
-
For Freezing: Let cool completely and store in freezer-safe containers for up to 1 year.
-
For Canning (Shelf-Stable): Ladle the hot apple butter into sterilized jars, leaving ¼-inch headspace. Process in a boiling water bath for 10 minutes.
PRO TIPS:
-
Don’t Rush the Simmer: Cooking it low and slow is what caramelizes the sugars and develops the deep, rich flavor characteristic of apple butter.
-
Spice to Taste: Spices can be adjusted to your preference. Start with the given amounts and add more later if you like.
-
Sweetness: The amount of sugar needed can vary based on the sweetness of your apples. Start with the recommended amount and add more towards the end of cooking if desired.
-
Why Lemon Juice: The lemon juice adds a touch of brightness that balances the sweetness and helps with preservation.
Enjoy the process and the incredible taste of homemade apple butter on toast, biscuits, oatmeal, or even as a glaze for meats!
